Thracia 776 Playthrough - Chapter 19


Chapter 19 - The Empire's Retaliation
Resets: 1 (60)
Turns: 9 (319)
Deploy:
Top: Leif, Safiya, Sarah, Linoan, Osian, Dagdar, Tanya, Callion, Homer, Brighton
Bottom: Dean, Nanna, Lara, Pan, Karin, Finn, Fergus, Glade, Hicks, Miranda,
Leif learns a very harsh lesson for thinking that saving Leonster meant that he could do the same for Alster so quickly afterwards. Capturing Leonster has put him on notice by the Empire, and has led to Bloom deploying the full weight on Freige's forces in the area into stomping out the rebels who have retaken Leonster castle. The assault on Alster was a complete failure. Leif's army faces heavy losses and Dorius sacrifices his life in order for what remnants of the strike force to be able to retreat.
The map once again like the previous chapter, has my team divided, odd number units start at the top with Leif, even number units start at the bottom close to the pursuing enemy forces. Miranda needs to be brought to this battle in order to recruit Conomor, preferably in the bottom of the map.
Read moreThracia 776 Playthrough - Chapter 18


Chapter 18 - The Liberation of Leonster
Resets: 8 (59)
Turns: 19 (310)
Deploy:
Left: Leif, Nanna, Lara, Mareeta, Eda, Pan, Tina, Asbel
Right: Olwen, Safiya, Linoan, Dean, Halvan, Lithis, Dagdar, Sarah
This is one of the most infamous chapters of FE5. Up there along with Chapter 22 and 24x. The reason for this chapter being a complete and total headache is due to the "most difficult recruitment in FE (tm)" in the form of Xavier.
In order to recruit Xavier, you need to escort 8 NPC units held in a box on the left side of the map, and have them talk to 8 different enemy units in the center chamber, before talking to Xavier to recruit him. The Enemy units will turn to NPC units and start attacking each other, and since they have Hammers and Killer Lances, they can very easily kill each other. The NPC units can also get captured and otherwise delayed by spawning reinforcements and the entire processes is one massive mess, and if anyone gets killed that isn't supposed to, that's a reset.

For the most part, the rest of the map isn't too much to concern with. There's dark mages that spawn in the bottom stairwell that are important to contain otherwise they start using Rewarp to throw themselves into other parts of the map, and a few treasures and thieves to take care of on each side of the map. But recruiting Xavier is not fun. One annoying thing about this map is that your team starts off in two groups, and this is one of the maps where being unable to choose starting location ends up being a bit of an issue. Basically, in the order of units selected on the deploy screen, odd numbered units will start on the left and even number units start on the right. Ordering on the screen being a simple left-to-right, top-to-bottom, like reading a page.
01 02 03
04 05 06
07 08 09
10 11 12...
and so forth
Fortunately, I do remember one trick to help the recruitment process a lot easier. By warping in a character that cannot counter attack, it is possible to corral all the armors in the center room towards the bottom left corner area making it less of a walk for the NPC hostages to reach to the armors to talk to, and for me to pick off the Friege armors that are in the mix, so that by the time the civilians reach the room, they will have a clean path to start interacting with ther armors. The named Armors will not attack civlians or capture civilians, but they will attack each other if they defect. Fortunately, as long as they are talked to, they don't have to actually survive for me to be able to talk to and recruit Xavier. I just need to hope that an enemy doesn't miss and get counter attacked and dunked on by a Hammer. It also doesn't help that sometimes the civilians will body block each other delaying recruitment.
Read moreThracia 776 Playthrough - Chapter 17


Chapter 17 - The Gathering Storm
Resets: 0 (51)
Turns: 11 (291)
Deploy:
Leif, Nanna, Eda, Karin, Dean, Sarah, Mareeta, Osian, Halvan, Tanya, Safiya, Asbel, Olwen, Finn, Fergus, Shanam
We arrive at the outskirts of Leonster castle. The castle is heavily guarded by numerous ballista stationed around the castle walls. We worry about our ability to storm the castle and think of if there are some alternative ways to do this.
This map is... not really what I was expecting it to be from the preview. There's a small scattering of enemies and... that's actually all we face. I thought the houses around the area would provide me some nice items, but instead they provide some alternative plans to help get past the ballista. Of which... no I don't want to shovel out 20000G or sacrifice the lives of the Leonster townfolk to do this, so I leave the area fairly disappointed.
I beat the map simply by ferrying a few characters up the left side cliff, and going in to defeat the boss. That's it. That's the chapter. At least Osian hit 20 now, so I can class change him.
Roster:
Leif - L17
Olwen - xx/9
Asbel - L20/5
Dean - xx/5
Safiya - L11/4
Pan - xx/4
Nanna - L20/3
Shanam - xx/1
Osian - L20
Halvan - L19
Karin - L17
Finn - L14
Sarah - L15
Eda - L14
Fergus - L14
Mareeta - L14
Tanya - L13
Shiva - L11
Lara - L5/6
Linoan - L9
Salem - L7
Tina - L2
I can conclusively say that choosing this split route is def. not the play. You get worse characters and worse items as a result. I think it probably takes longer to get through the maps too.
Thracia 776 Playthrough - Chapter 16


Chapter 16 - The Mirage Forest
Resets: 5 (51)
Turns: 18 (280)
Deploy:
Leif, Safiya, Linoan, Karin, Eda, Dean, Osian, Halvan, Homer, Pan, Lara, Asbel
We decide to go down to the forest. The Loptian Order has a base of operations in the forest, and have apparently held someone hostage in the castle. The map is densly packed with both forest and impassable thicket tiles. And to make things worse, there are trap tiles that will warp characters to other places of the map. Of which, since this is my first time playing the map, I don't actually know where all the trap tiles are.
The boss is in the center of the map and has a Berserk Staff, which is generally a pain to deal with. He also appears to be unkillable for the first few turns of the map until Sarah shows up, so I kind of just have to endure harassment from the Berserk Staff usage, which he almost always targets Halvan so I at least know who should always be beside a healer at the start of the map.
There are a number of valuable items in this map throughout the map from capturable enemies including a spare Vogue, a Luna Skill manual, Sleep Sword, Silver Swords, and a Wind Blade. So it would be nice if I can find some time to pick up these items.
Read moreThracia 776 Playthrough - Chapter 15


Chapter 15 - Two Paths
Resets: 2 (46)
Turns: 7 (262)
Deploy
Leif, Nanna, Mareeta, Linoan, Lara, Finn, Glade, Halvan, Dean, Eda, Karin, Olwen
As mentioned we reach a fork in the road, there are two strategic paths on the way to reaching Leonster castle. One takes us along a coastline, while the other takes is through a dense forest. There is a slight difference in characters that get recruited as a result, along with some characters that may get recruited earlier or later.
As for the map. There's two arrows on opposite sides of the map, but in reality I end up going to neither of them, as it is easier to fulfill a different third condition. I can't exactly remember what the reason is, but there is an additional condition to clearing the map other than reaching one of the two arrows, which leads to being able to choose which one to go to after the map. I guess I'll try to remember what it is after playing. Which the answer is that the objective is to visit the church with Leif.
Read moreThracia 776 Playthrough - Chapter 14x


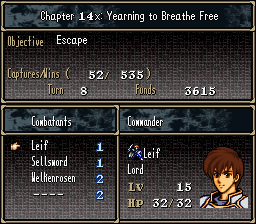
Chapter 14x - Yearning to Breathe Free
Resets: 2 (44)
Turns: 8 (255)
Deploy:
Leif, Karin, Eda, Dean, Finn, Osian, Pan, Asbel, Tanya, Safiya
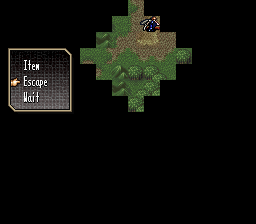
Leif is escaping from Tahra, it's nightfall in a valley area, and apparently a large group of civilians are trying to follow us through the valley. We get ambushed by Silessian mercenaries and Loptian forces. Basically, NPC civs will show up from the bottom, and if I take the time to save any, I get a S drink as a reward. IIRC, they just keep spawning endlessly so there's no point waiting around too long for them, and it's best to maybe pick up one, then make a dash towards the escape point at the top.
Read moreThracia 776 Playthrough - Chapter 14

Chapter 14 - The Onslaught
Resets: 2 (42)
Turns: 10 (247)
Deploy:
Leif, Lara, Nanna, Karin, Fergus, Olwen, Asbel, Shiva, Halvan, Dagdar, Osian, Mareeta, Salem, Tina
We have reached our destiation of Tahra. Leif wastes no time in meeting up with generals to help devise a plan of action to weather the upcoming seige. Friege's army is now in place and ready to begin the assault. A large battle is about to unfold. Eda, and Dean also join in to help out in this fight. We learn that Dean was actually sent here personally by Prince Aurion to oversee and help defend Linoan and Tahra from the empire during their uprising, as Linoan is actually Aurion's fiancee. Aurion would have flown to her aid personally, but couldn't leave the Thracia unattended.
This is the first instance of a Defend map in this game. The goal is to simply survive for 10 turns, as waves of enemies pour in. There are a couple houses way outside the perimeter of the castle walls, but they can be a bit tricky to go after, making them a bit less worth going for, but the items received from them are definitely worth the trip. A large number of the enemies initially on the map are armors, making armor effective weaponry really nice to have to quickly deal with the enemies. I do need to be careful however, not create a situation for myself where I kill too many enemies allowing them to get enough hits in to finally KO one of my units.
The boss units on this map are fairly strong. They have a Meisterlanze and Meisteraxt, which are powerful brave range 1-2 weapons, along with them being Generals so that they have a random chance of negating all damage from an attack. One of them just sits off to the side, and I don't have to worry too much about him, the other is leading the charge from just south of the castle city walls, and he a more immediate threat. Unlike the previous map, killing the bosses does not cause the enemies to stop attacking, so it's best to just steer clear of the bottom left side of the map until I've gotten everything else under control, although, it is possible to put the bosses to sleep. In fact, putting the boss in the bottom left to sleep can allow me to take his stuff, though it's still difficult to actually have the time to pick him up to do so.
Read more